SeaCat Tutorial - Chapter 1: Hello World (iOS)
Foreword
This is the first practical tutorial in our tutorial series to demonstrate the strength and capabilities of SeaCat secure access solution. Our goal is to develop several sample applications and uncover the best practices you might be interested in.
In this text we create a simple Node.js host and an iOS app which reads a JSON response generated by that host. As our motivation is mainly security, we also incorporate SeaCat to enable fast and convenient secure communication between our iOS client and Node.js host.
Requirements
Before we start, please make sure you have installed following software/packages in your development environment (assuming you have Mac OS X):
- Xcode
- Node.js
- SeaCat (trial pack)
Creating Node.js host
The preparation a basic Node.js host is very straightforward. You can get things done in just few lines of code. In your favorite text editor write following lines of code (or download HelloWorldNodeHost.js from GitHub):
var http = require('http');

var json_content = {
    message: "Hello world"
};

http.createServer(function(request, response){
    response.writeHead(200, {'Content-Type': 'text/json'});
    response.write(JSON.stringify(json_content));
    response.end()
}).listen(1337, '127.0.0.1');

console.log("Running Node.js host...");
This is very simple HTTP REST responder that emits simple JSON object for any HTTP request to http://localhost:1337/.
Save this code to a JavaScript file (HelloWorldNodeHost.js in our case) and run it by typing node fileName.js in terminal (node HelloWorldNodeHost.js in our case). If you are successful, you will see an output similar to this:

To test if everything runs correctly, please open another terminal and type curl http://localhost:1337; echo there (echo stands for adding a new line character at the of output stream).

The response should be: {"message":"Hello world"} as shown in the picture above. Your host is ready. Keep it running.
SeaCat Gateway Configuration
Another important step in our solution is to configure the SeaCat Gateway which helps to handle the communication between your Node.js host and your iOS application.
Download SeaCat trial installation package and unpack the package by typing tar xjvf SeaCat_Trial_OSX_iOS_14.12.tar.bz2 in terminal.

Next step is the final configuration. In unpacked structure check the file seacat-trial.conf in SeaCat_Trial_OSX_iOS/SeaCatGateway directory. The default configuration have following structure:
[host:test]
uri=http://127.0.0.1/
Change the configuration as following (our host listens on port 1337):
[host:nodejshost]
uri=http://127.0.0.1:1337/
You can also download the updated version of seacat-trial.conf from GitHub.
Once you save the changes in seacat-trial.conf, run the SeaCat Gateway by typing ./seacatd-trial in terminal window (in the same directory as the config file). If you see the output similar to following, your SeaCat Gateway is set correctly.

Keep both Node.js host and SeaCat Gateway running.
iOS Application
Last step in this journey is to write a iOS application which reads the JSON response from the SeaCat Gateway which communicate with the Node.js host via SeaCat Gateway. This application will use SeaCat Client to facilitate this communication.
Open Xcode and create a new iOS application. From the template list select Single View Application and click on the Next button.

Next pane contains several fields which are important for the app identification. Type HelloWorld to Product Name and Class Prefix fields. How you fill other two fields is completely up to you. For the purpose of our tutorial fields Organization name and Company Identifier are unrelated.

Click on the Next button again and Xcode creates initial application structure on the disk. Your environment will look like this:

Integration of SeaCat client
As the next and important step, it is necessary to add SeaCat client into your application. This process is very simple. In Finder open SeaCat_Trial_OSX_iOS folder and drag SeaCatClientTrial.framework object into Frameworks directory in Xcode.

When next screen appear, the only thing you have to make sure is to have Destination option checked. This will help to copy the framework into project structure.

Once you click on Finish button, you will see SeaCatClientTrial.framework among other ones.

Adding interactivity
To incorporate the framework into the structure of our app is not enough, we also have to connect the SeaCatClient with our app code. To do that is very straightforward. Just click on HelloWorldAppDelegate.m file in the Xcode project structure.

And change the code from the default:
#import "HelloWorldAppDelegate.h"

@implementation HelloWorldAppDelegate

- (BOOL)application:(UIApplication *)application didFinishLaunchingWithOptions:(NSDictionary *)launchOptions
{
    // Override point for customization after application launch.
    return YES;
}
to one where SeaCat is incorporated:
#import "HelloWorldAppDelegate.h"
#import <SeaCatClientTrial/SeaCat.h>

@implementation HelloWorldAppDelegate

- (BOOL)application:(UIApplication *)application didFinishLaunchingWithOptions: (NSDictionary *)launchOptions
{
    /* This method finalises SeaCat client initial configuration. It also ensures that client is integrated with Core Foundation URL Loading System (check Apple URLLoadingSystem in documentation for more information). So all URL requests are intercepted, analysed and eventually processed by SeaCat gateway instead of common HTTP transport. */

    [SeaCatClient configure];

    return YES;
}
The more information about URL Loading System is available in official documentation.
Designing an User Interface
Once you finish the previous steps, open Main.storyboard from the project structure and add UILabel component from the Object Library pane to Hello World View Controller container in Main.storyboard.

Next step in our development is to connect the label from the Interface Builder (Main.storyboard) with the code (HelloWorldViewController.h and HelloWorldViewController.m in our case).
In Main.storyboard show the Assistant Editor and make sure you see HelloWorldViewController.h file in the code part.

Click on UILabel object (placed in Hello World View Controller container), hold CTRL key on your keyboard and drag the cursor into HelloWorldViewController.h

If you did everything correctly, you will see a small dialog. Make sure the Connection is set Outlet and Name to result. Once your settings is done, click on Connect button.

Following line of code will be added to your HelloWorldViewController.h
@property (weak, nonatomic) IBOutlet UILabel *result;You can also change the size of the Label in Main.storyboard. Your final output will be much better.

URL Request to host
Add following code at the end of the HelloWorldViewController.m (before the final @end):
- (void)fetchGreeting
{
    /* Following two lines represent fairly standard URL request mechanism provided by Apple Core Foundation. SeaCat functionality is triggered by '.seacat' extension of URL host (see https://nodejshost.seacat/). Such a request is intercepted by SeaCat client, forwarded in secure way to SeaCat gateway and consequently to 'nodejshost' host.*/

    NSURL *url = [NSURL URLWithString:@"https://nodejshost.seacat/"];
    NSURLRequest *request = [NSURLRequest requestWithURL:url];

   /* Parsing  of response in JSON format. */

    [NSURLConnection sendAsynchronousRequest: request
        queue:[NSOperationQueue mainQueue]
        completionHandler:^(NSURLResponse *response, NSData *data,NSError *connectionError)
    {
        if (data.length > 0 && connectionError == nil)
        {
            NSDictionary *greeting = [NSJSONSerialization JSONObjectWithData:data options: 0 error:NULL];
            self.result.text = [greeting objectForKey:@"message"];
        }
    }];
}
And we finish our effort by adding [self fetchGreeting]; to -(void)viewDidLoad method (in HelloWorldViewController.m)
- (void)viewDidLoad
{
    [super viewDidLoad];
    [self fetchGreeting];
}
We are done
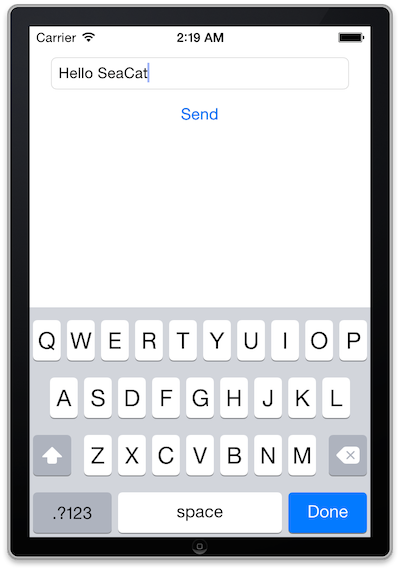
Now you can run the app in simulator.

And see Hello World message in your label.

Pretty cool, isn't it? With a minimal effort we built a functional and secure application with using of SeaCat architecture.
All source codes from this example are available in GitHub.
Please visit also other blog entries from SeaCat Tutorial series.
SeaCat iOS tutorials in this series:

Most Recent Articles
You Might Be Interested in Reading These Articles

Log management for absolute beginners
New to log management and cybersecurity? Or, maybe you're already a pro, but you're looking for a way to explain log management to someone who is? Either way, you're in the right place.
Published on April 15, 2024
SeaCat tutorial - Chapter 2: Simple Post (iOS)
The goal of this article is to create a simple iOS client which generates a simple POST Request which will be read in host written in Node.js and the output generated in the console. The whole comunication will be handled by SeaCat which help us to establish fast and secure connection among our key components.
Published on September 09, 2014

A beginner-friendly intro to the Correlator for effective cybersecurity detection
At TeskaLabs, we know that a cybersecurity system is only as effective as its ability to detect threats. That's why we developed a powerful tool that will prove essential in your arsenal: the Correlator.
Published on March 15, 2024